9 posts on SVG

Utility: Convert SVG path to all-relative or all-absolute commands

2 min read 0 comments Report broken page

I like hand-editing my SVGs. Often I will create an initial version in Illustrator, and then export and continue with hand editing. Not only is it a bit of a meditative experience and it satisfies my obsessive-compulsive tendencies to clean up the code, it has actual practical benefits when you need to make certain changes or introduce animation. Some things are easier to do in a GUI, and others are easier to do in code, and I like having the flexibility to pick which one fits my use case best.

However, there was always a thing that was a PITA: modifying paths. Usually if I need anything more complicated than just moving them, I’d do it in Illustrator, but even moving them can be painful if they are not all relative (and no, I don’t like introducing pointless transforms for things that should really be in the d attribute).

For example, this was today’s result of trying to move an exported “a” glyph from Raleway Bold by modifying its first M command:

Trying to move a path by changing its first M command when not all of its commands are relative.

This happened because even though most commands were exported as relative, several were not and I had not noticed. I have no idea why some commands were exported as absolute, it seems kind of random.

When all commands are relative, moving a path is as simple as manipulating its initial M command and the rest just adapts, because that’s the whole point of relative commands. Same with manipulating every other part of the path, the rest of it just adapts. It’s beautiful. I honestly have no idea why anybody would favor absolute commands. And yet, googling “convert SVG path to relative” yields one result, whereas there are plenty of results about converting paths to absolute. No idea why that’s even desirable, ever (?).

I remembered I had come across that result before. Thankfully, there’s also a fiddle to go with it, which I had used in the past to convert my path. I love it, it uses this library called Snap.svg which supports converting paths to relative as a just-add-water utility method. However, that fiddle is a quick demo to answer a StackOverflow question, so the UI is not super pleasant to use (there is no UI: you just manipulate the path in the SVG and wait for the fiddle to run). This time around, I needed to convert multiple paths, so I needed a more efficient UI.

So I created this demo which is also based on Snap.svg, but has a slightly more efficient UI. You just paste your path in a textarea and it both displays it and instantly converts it to all-relative and all-absolute paths (also using Snap.svg). It also displays both your original path and the two converted ones, so you can make sure they still look the same. It even follows a pending-delete pattern so you can just focus on the output textarea and hit Cmd-C in one fell swoop.

I wasn’t sure about posting this or just tweeting it (it literally took less than 30 minutes — including this blog post — and I tend to only post small things like that on my twitter), but I thought it might be useful to others googling the same thing, so I may as well post it here for posterity. Enjoy!


Dynamically generated SVG through SASS + A 3D animated RGB cube!

3 min read 0 comments Report broken page

Screenshot of the cubeToday, I was giving the opening keynote at Codemania in Auckland, New Zealand. It was a talk about color from a math/dev perspective. It went quite well, despite my complete lack of sleep. I mean that quite literally: I hadn’t slept all night. No, it wasn’t the jetlag or the nervousness that kept me up. It was my late minute decision to replace the static, low-res image of an RGB cube I was using until then with a 3D cube generated with CSS and animated with CSS animations. Next thing I knew, it was light outside and I had to start getting ready. However, I don’t regret literally losing sleep to make a slide that is only shown for 20 seconds at most. Not only it was super fun to develop, but also yielded a few things that I thought were interesting enough to blog about.

The most challenging part wasn’t actually the 3D cube. This has been done tons of times before, it was probably the most common demo for CSS 3D transforms a couple of years ago. The only part of this that could be of interest is that mine only used 2 elements for the cube. This is a dabblet of the cube, without any RGB gradients on it:

The challenging part was creating the gradients for the 6 sides. These are not plain gradients, as you can see below:

RGB cube sidesThese are basically two linear gradients from left to right, with the topmost one being masked with a gradient from top to bottom. You can use CSS Masking to achieve this (for Chrome/Safari) and SVG Masks for Firefox, but this masks the whole element, which would hide the pseudo-elements needed for the sides. What I needed was masks applied to backgrounds only, not the whole element.

It seemed obvious that the best idea would be to use SVG background images. For example, here is the SVG background needed for the top left one:

<svg xmlns="http://www.w3.org/2000/svg" width="200px" height="200px">

<linearGradient id="yellow-white" x1="0" x2="0" y1="0" y2="1"> <stop stop-color="yellow" /> <stop offset="1" stop-color="white" /> </linearGradient> <linearGradient id="magenta-red" x1="0" x2="0" y1="0" y2="1"> <stop stop-color="red" /> <stop offset="1" stop-color="magenta" /> </linearGradient> <linearGradient id="gradient" x1="0" x2="1" y1="0" y2="0"> <stop stop-color="white" /> <stop offset="1" stop-color="black" /> </linearGradient> <mask id="gradient-mask"> <rect width="100%" height="100%" fill="url(#gradient)"/> </mask>

<rect width="100%" height="100%" fill="url(#yellow-white)"/> <rect width="100%" height="100%" fill="url(#magenta-red)" mask="url(#gradient-mask)"/>

</svg>

However, I didn’t want to have 6 separate SVG files, especially with this kind of repetition (cross-linking to reuse gradients and masks across different files is still fairly buggy in certain browsers). I wanted to be able to edit this straight from my CSS. And then it hit me: I was using SASS already. I could code SASS functions that generate SVG data URIs!

Here’s the set of SVG generating SASS functions I ended up writing:

@function inline-svg($content, $width: $side, $height: $side) {
	@return url('data:image/svg+xml,#{$content}');
}

@function svg-rect($fill, $width: ‘100%’, $height: $width, $x: ‘0’, $y: ‘0’) { @return unquote(‘’); }

@function svg-gradient($id, $color1, $color2, $x1: 0, $x2: 0, $y1: 0, $y2: 1) { @return unquote(’

'); }

@function svg-mask($id, content) { @return unquote('#{content}'); }

And then I was able to generate each RGB plane with another function that made use of them:

@function rgb-plane($c1, $c2, $c3, $c4) {
	@return inline-svg(
		svg-gradient('top', $c1, $c2) +
		svg-gradient('bottom', $c3, $c4) +
		svg-gradient('gradient', white, black, 0, 1, 0, 0) +
		svg-mask('gradient-mask', svg-rect('url(%23gradient)')) +
		svg-rect('url(%23bottom)') +
		svg-rect('url(%23top)" mask="url(%23gradient-mask)')
	);
}

/* … */

.cube { background: rgb-plane(blue, black, aqua, lime);

&::before { background: rgb-plane(blue, fuchsia, aqua, white); }

&::after { background: rgb-plane(fuchsia, red, blue, black); } }

.cube .sides { background: rgb-plane(yellow, lime, red, black);

&::before { background: rgb-plane(yellow, white, red, fuchsia); }

&::after { background: rgb-plane(white, aqua, yellow, lime); } }

However, the same functions can be used for all sorts of SVG backgrounds and it’s very easy to add a new one. E.g. to make polygons:

@function svg-polygon($fill, $points) {
	@return unquote('');
}

@function svg-circle($fill, $r: ‘50%’, $cx: ‘50%’, $cy: ‘50%’) { @return unquote(‘’); }

You can see the whole SCSS file here and its CSS output here.

Warning: Keep in mind that IE9 and some older versions of other browsers have issues with unencoded SVG data URIs. Also, you still need to escape hashes (%23 instead of #), otherwise Firefox fails.


Preview corner-shape, before implementations!

1 min read 0 comments Report broken page

As an editor of the Backgrounds & Borders Level 4 spec, I am naturally a bit more interested in the cool features it will bring, once implementations start (it’s currently too early for that). One of the coolest features in it is corner-shape. While in Backgrounds & Borders 3, border-radius was only used for rounded (actually, elliptical) corners, with the help of corner-shape, it will be able to do so much more! Beveled corners, scoop-style corners (informally known as “negative border-radius”), even rectangular notches.

Unfortunately, until it’s implemented in browsers, it’s hard to play with it. Or, is it? I spent the weekend creating an app in which you can enter values for corner-shape, border-radius, width, and height, and see the result, simulated through SVG, as well as the fallback in browsers that don’t support border-corner-radius (which is currently all browsers).

corner-shape preview

Obviously, it’s not a full preview, since you can only play with a limited subset of CSS properties, but it should be good for seeing the kinds of shapes that will be possible.You could also copy the generated SVG from the Developer tools of your browser, and use it as a background in any website!

Use it here: corner-shape preview

Tested to work in at least Chrome, IE9, Firefox, Safari and theoretically, should work in any SVG-enabled browser.

Enjoy! Hope you like it.

Important: Please note that corner-shape is still at a very early stage and might completely change before implementations. You can also help to make it better: Play with it and comment on what you think about its naming and functionality!


Easily center text vertically, with SVG!

2 min read 0 comments Report broken page

These days, we have a number of different ways to vertically align text in a container of variable dimensions:

  • Table display modes
  • Flexbox
  • inline-block hacks
  • Wrapping the text in an extra element and absolutely positioning it
  • …and probably many others I’m forgetting

However, often comes a time when neither is suitable, so here I am, adding yet another option to the list. Of course, it comes with its own set of drawbacks, but there are cases where it might be better than the existing solutions.

It all started when I discovered the text-anchor SVG property. It determines where the x and y attributes on <text> elements refer to. The magic starts when you set it to “middle”, then the x and y attributes refer to the center of the text. So, if you set those to 50%, they refer to the center of the SVG graphic itself, and if you set the SVG width and height to 100%, the text basically sits in the center of the <svg>’s container, which could be any HTML element!

One issue was that this centered the baseline of the text, so I tried to find a way to shift the baseline appropriately. Setting dominant-baseline: middle; on the ```](http://www.w3.org/TR/SVG/text.html#TextElement) element seemed to fix it, but it looks like IE doesn’t support that. I ended up adding [`dy`](http://www.w3.org/TR/SVG/text.html#TextElementDYAttribute)=“.3em” to the [`` element, which fixes it but might need to be adjusted if you change the line-height.

In addition, this method has the following drawbacks I can think of:

  • Extra markup (namely 2 elements: <svg> and <text>)
  • If the text is more than one line, it won’t automatically wrap, you have to do it manually.
  • Some new-ish CSS text properties may not be applied. For example, text-shadow is applied in Chrome but not in Firefox, since technically, it’s still not a part of the SVG spec.
  • You need to duplicate the text color as a fill property, since SVG does not understand the color CSS property. No need to duplicate anything, just use fill: currentColor; (thanks GreLI!)

However, it has a few advantages too:

  • You don’t need to change anything on the parent HTML element
  • Degrades gracefully in non-SVG browsers
  • Should be perfectly accessible and won’t break SEO
  • Works perfectly in IE9, unlike Flexbox
  • You can include any kind of SVG styling on the text. For example, strokes!

You can see and play with the result in the dabblet below:

Verified to work in at least Chrome, Firefox, IE9+. Hope it’s useful, even though it won’t be a good fit in every single use case.


Text masking — The standards way

2 min read 0 comments Report broken page

As much as I like .net magazine, I was recently outraged by their “Texturizing Web Type” article. It features a way to apply a texture to text with -webkit-mask-image, presenting it as an experimental CSS property and misleading readers. There are even -moz-, -o- and -ms- prefixes for something that is not present in any specification, and is therefore unlikely to ever be supported by any non-WebKit browser, which further contributes to the misdirection. A while back, I wrote about how detrimental to our work and industry such proprietary features can be.

A common response to such complaints is that they are merely philosophical and who cares if the feature works right now and degrades gracefully. This argument could be valid for some cases, when the style is just a minor, gracefully degrading enhancement and no standards compliant alternative is present (for example, I’ve used ::-webkit-scrollbar styles myself). However, this is not the case here. We have had a standards compliant alternative for this for the past 11 years and it’s called SVG. It can also do much more than masking, if you give it a chance. Here’s an example of texturized text with SVG:

Edit: Thanks to @devongovett’s improvements, the code is now simpler & shorter.

Yes, the syntax might be more unwieldy but it works in a much wider range of browsers: Chrome, Safari, Firefox, IE9, Opera. Also, it’s trivial to make a script that generates the SVG markup from headings and applies the correct measurements for each one. When WebKit fixes this bug, we can even move the pattern to a separate SVG file and reference it from there.

In case you’re wondering about semantics, the <svg> element is considered “flow content” and is therefore allowed in heading elements. Also, even if search engines don’t understand inline SVG, they will just ignore the tags and still see the content inside the <text> element. Based on that, you could even make it degrade gracefully in IE8, as long as you include the HTML5 fix for the <svg> element. Then the CSS rules for the typography will still apply. You’ll just need to conditionally hide the <image>, since IE8 displays a broken image there (a little known fact is that, in HTML, <image> is basically equivalent to <img>, so IE8 treats it as such) .

Credits to David Storey’s original example that inspired this.


CSS gradients are faster than SVG backgrounds

1 min read 0 comments Report broken page

Which is really sad, because SVG is awesome. It lets you do what CSS gradients do and much more, in quite a small filesize, as it’s just text too. However, the browser needs to generate a DOM for every SVG graphic, which results in sluggishness.

Here’s my test case

Mouse over the 2 divs. They both use a spotlight effect that’s dynamically updated according to the position of the mouse cursor. One of them does it with an SVG (through a data URI), the other one through a CSS radial gradient.

The test only works in Chrome, Firefox nightlies and perhaps IE10 (haven’t tested in Windows). Why? Because Opera doesn’t support radial gradients yet (however you can see how slow SVG is in it too), and Firefox before the nightlies used to have a bug with gradients in SVG through data URIs. Also, jsFiddle seems not to work in Webkit nightlies for some reason, but I’m too lazy right now to make a self-hosted test case.

Thanks a lot to Christian Krebs (lead developer of Opera Dragonfly) who inspired these tests after a discussion we had today regarding CSS gradient performance.

Edit: According to some commenters, they’re the same speed on Windows and Linux, so it could be an OSX issue. The only way to know for sure is to post more results, so go ahead and post yours!

Also, some commenters say that this is not a fair comparison, because it generates a new SVG every time. I have several arguments to reply to this:

  1. We also generate a new gradient every time, so it is fair.
  2. You can’t manipulate an SVG used for a background, so it’s not an option for backgrounds. JS doesn’t run in it and you don’t have access to its DOM. The only way to do that would be to use an inline SVG embedded in HTML and the element() CSS3 function. However, that’s only supported by Firefox, so not really a pragmatic option.

CSS reflections for Firefox, with -moz-element() and SVG masks

2 min read 0 comments Report broken page

We all know about the proprietary (and imho, horrible) -webkit-box-reflect. However, you can create just as flexible reflections in Firefox as well, by utilizing -moz-element(), some CSS3 and Firefox’s capability to apply SVG effects to HTML elements. And all these are actually standards, so eventually, this will work in all browsers, unlike -webkit-box-reflect, which was never accepted by the CSS WG.

First and foremost, have a look at the demo:

How it works

  • For every element, we generate an ::after pseudoelement with the same dimensions and a position of being right below our original element.
  • Then, we make it appear the same as our element, by giving it a background of ‑moz-element(#element-id) and no content.
  • Reflections are flipped, so we flip it vertically, by applying transform: scaleY(‑1);
  • If we want the reflection to have a little distance from the element (for example 10px like the demo), we also apply a transform of translateY(10px)
  • We want the reflection to not be as opaque as the real element, so we give it an opacity of around 0.3-0.4
  • At this point, we already have a decent reflection, and we didn’t even need SVG masks yet. It’s essentially the same result -webkit-box-reflect gives if you don’t specify a mask image. However, to really make it look like a reflection, we apply a mask through an SVG and the mask CSS property. In this demo, the SVG is external, but it could be a data URI, or even embedded in the HTML.

Caveats

  • Won’t work with replaced elements (form controls, images etc).
  • If you have borders, it gets a bit more complicated to size it properly
  • Doesn’t degrade gracefully, you still get the pseudoelement in other browsers, so you need to filter it out yourself
  • Bad browser support (currently only Firefox 4+)
  • You need to set the reflection’s background for every element and every element needs an id to use it (but this could be done automatically via script)

Further reading

Credits: Thanks to Christian Heilmann for helping me debug why SVG masks for HTML elements weren’t originally working for me.


Organizing a university course on modern Web development

9 min read 0 comments Report broken page

About a year ago, prof. Vasilis Vassalos of Athens University of Economics and Business approached me and asked for my help in a new course they were preparing for their Computer Science department, which would introduce 4th year undergrads to various web development aspects. Since I was always complaining about how outdated higher education is when it comes to web development, I saw it as my chance to help things change for the better, so I agreed without a second thought.

This is one of the main reasons I didn’t have time to write many blog posts for the past months: This activity took up all my spare time. However, it proved to be an interesting and enlightening experience, in more than one ways. In this blog post I’ll describe the dilemmas we faced, the decisions we made and the insights I gained throughout these 6 months, with the hope that they’ll prove to be useful for anyone involved in something similar.

Table of contents

  1. Content
  2. Homework
  3. Labs
  4. Personal aftermath

Content

The goals of a university course differ from the ones of a professional seminar or conference session in many ways, the key one being that most of its students will (professionally) utilize the things they learned in the future and not right after they walk away from class. So, the stuff being taught must be useful even after a couple years have passed. Also, issues of the present might not be issues of the future and what isn’t possible today (due to browser support issues) will probably be tomorrow. These observations led us to decide against teaching proprietary stuff. Instead, we only included  things which come with a specification that has reached a fairly stable state (with the exception of very widespread non-standard stuff, such as innerHTML). We also decided not to address workarounds and browser incompatibilities at all, since these would probably be out of date in a few years. Also because, if we teach everything else right, they should be able to learn these by themselves, if needed (we did teach feature detection techniques though, those are timeless ;-)). We also included many cutting edge topics (CSS3, HTML5, ES5, SVG…) since we believe that they will be necessary tools of the trade tomorrow. To be pragmatic however, we did not teach stuff that no browser has implemented yet, besides perhaps a brief mention.

To make things easier for the students, we used Firefox 3.6 for everything. We tested their assignments there, we used it to present something in the labs etc. Why Firefox?

  • It’s at a quite good level of standards compliance and implements many modern technologies & features
  • Fewer bugs (Webkit implements stuff faster, but in more buggy ways)
  • It has the best development tools (Firebug)
  • With Brendan Eich being Mozilla’s CTO, we all know how progressive Firefox is when it comes to JavaScript.

Of course, this doesn’t mean it’s the only right choice. Google Chrome for example would be another good pick.

Another useful observation was that 4th year Computer Science students already know programming quite well, especially Java. So, we did not need to go through the basics of programming syntax like introductory books or seminars frequently do. Consequently, we skipped explaining how control structures or operators work in JavaScript or PHP and just focused on their differences from Java and other languages.

Another dilemma we faced was whether we should teach stuff on popular frameworks and whether we should allow them in the homeworks. We decided against allowing them in the homeworks because I believe that someone must not use a framework just to skip learning about the intricacies of a language. They should be used after the basics have been consolidated, in order to save time. Also because if everyone skips learning and just uses an abstraction to do the heavy lifting from the very beginning, who will write the abstractions after all? Another reason was that a large portion of every JavaScript framework is about handling cross-browser differences. However, these had no place in our course, so a JS framework wasn’t as necessary as it is in day to day web development. Regarding teaching them, we thought it would be a good idea to introduce students to the popular JS & PHP frameworks in the last lectures, but there was no time left. Maybe next year.

To sum up, the course content ended up being (I’m listing client-side matters more extensively, since they are also the focus of this blog):

  • General stuff about web application architecture and how the HTTP protocol works
  • We presented a small web application example (an AJAX shopping cart) in order for the students to get an idea about how everything clicks together
  • Markup languages
    • SGML
    • DTDs
    • HTML and XHTML
      • Basic structure of an (X)HTML document
      • Content model, block vs inline elements
      • Basic HTML elements
        • headings & paragraphs
        • lists (ordered, unordered, definition lists)
        • tables
        • grouping elements (div & span)
      • Doctypes, the HTML5 doctype
      • The incentives behind XHTML & the future ((X)HTML 5)
      • (X)HTML Validation
      • HTML forms
        • How forms work, GET vs POST
        • Form controls, shared attributes
        • The various input types (+ the new ones HTML5 brings)
        • Other form controls (buttons, <select> lists, textareas)
        • Basic form accessibility (labels & fieldsets)
      • Working with Multimedia (old methods, HTML5 video & audio elements, comparison)
    • XML and XPath, XQuery, XSLT
  • CSS
    • CSS standards
    • CSS rules
    • Validation
    • Adding CSS to a page (linking/embedding methods)
    • Media targeting (The media attribute, @media rules, media queries)
    • CSS selectors
      • Introduction to the DOM
      • Basic selectors (Universal selector, Type selector, Class selector, Id selector)
      • Classes vs Ids
      • Attribute selectors (all 6)
      • Pseudo-classes (including most of the CSS3 ones)
      • Pseudo-elements
      • Simple selectors & simple selector sequences
      • Combinators (all 4)
      • Selector grouping
      • XML namespaces & CSS
    • Cascading & Inheritance
      • The problem: Conflicts
      • Specificity
      • Origin
      • !important
      • Inheritance
      • The special value inherit
    • Properties & values
      • Keywords
      • Numerical values & units
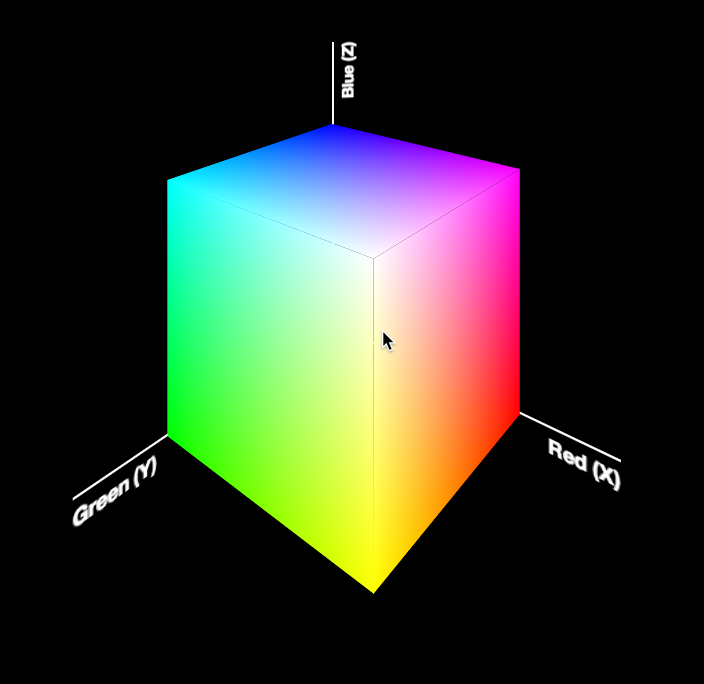
      • Colors (including CSS3 colors)
      • How shorthands work
      • Unsupported values & providing fallbacks
    • Box model
      • width & height
      • Block level & inline level elements (reminder from the HTML lectures)
      • The display property
      • border
      • padding
      • margin
    • Positioning
      • The position property
      • Positioning types (absolute, relative, fixed)
      • z-index
      • float
      • Problems with floats, the clear property
    • Generated content
      • ::before and ::after
      • Static generated content
      • Dynamic generated content (attributes & counters)
  • JavaScript
    • Adding JS to a document
    • Separation of concerns
    • A first, annotated, example (a simple script that generates tables of content from

      headings)

    • Basic syntax rules (including semicolons & semicolon insertion)
    • Variables
    • Operators (including typeof, the comma operator, strict operators, differences of &&/|| in JS)
    • Primitives (String, Number, Boolean, null, undefined)
    • Conversion across primitives
    • Objects
    • The in & delete operators
    • for…in loops
    • Native objects for primitives (eg the literal 5 vs new Number(5))
    • The global object
    • Functions (including function expressions vs function declarations)
    • this & changing execution context
    • Arrays (including .forEach() traversal)
    • Regular expressions in JavaScript
    • OOP in JavaScript
      • OOP concepts in JS
      • Constructors
      • Inheritance
      • Encapsulation (private, priviledged & public properties)
      • Method overloading
      • JavaScript shortcomings when it comes to OOP
      • for…in loops, inherited properties & [[Enumerable]], .hasOwnProperty()
      • Type detection based on [[Class]] detection (using Object.prototype.toString())
    • DOM
      • Traversal
      • Node types
      • Selecting elements (getElementById, getElementsByClassName, getElementsByName, querySelector, using XPath to select elements)
      • DOM Manipulation
      • innerHTML, advantages & criticism
    • Events
      • Binding & Removing event handlers
      • Traditional event binding
      • Capturing & bubbling
      • Event objects
      • Event delegation
      • Firing events
      • Custom events
      • What if there’s no mouse?
    • Client side storage
      • Cookies via HTTP headers, cookies in JavaScript
      • Problems with cookies
      • Web storage (localStorage, sessionStorage)
      • Client-side databases
    • BOM
      • The window object, window names
      • Opening new windows
      • Cross-window communication
      • Closing windows, Focusing on windows
      • Cross-origin window communication
      • location & it’s components
      • The history, screen & navigator objects
      • User Agent strings
      • Why you shouldn’t use browser detection
      • Built-in modal windows (alert, confirm, prompt)
    • JavaScript & CSS
      • CSS modification (className & classList, inline styles)
      • CSSStyleDeclaration objects
      • The document.styleSheets collection
      • Switching stylesheets
      • StyleSheet objects
      • CSSStyleRule objects
      • Computed style, getting the computed style
    • Asynchronous execution
      • Timeouts & Intervals
      • Background workers
    • Graphics creation (canvas)
    • A brief mention of WebGL (we also showed the video of Google’s web based DOOM game)
    • Best practices
      • When JS is disabled
      • Feature detection
  • Regular expressions
  • Ajax (including data interchange formats, like JSON, other async data transmission techniques, including dynamic script loading & JSONP, usability concerns)
  • SVG
  • Server side web development
    • PHP (also covering OOP in PHP extensively)
    • Database driven websites
    • State & session management
    • REST
    • SOAP
  • Web application security

Note: For brevity reasons, the lists above do not include introductory stuff such as:

  • What’s X?
  • A brief history of X
  • Why use X?
  • etc

Lessons learned

It’s very hard to momentarily change your mindset and try to imagine that you live in a modern, fully standards-based web development world, where old browsers, proprietary stuff, hacks and compatibility workarounds have no place. A world where IE doesn’t exist. However, it’s the world that all our material assumed, for the reasons stated above. And it’s beautiful, so much that it becomes addictive and makes you hate all these bugs & incompatibilities that we have to face today even more.

Homework

The students were given 3 assignments throughout the semester, each covering:

  • 1st assignment: HTML, CSS, XPath, XSLT
  • 2nd assignment: JavaScript, Ajax, SVG
  • 3rd assignment: Server side web dev + CSS, JavaScript, Ajax

These homeworks accounted for 30% of their final grade (10% each), which probably should have been more.

We searched for exercises on these topics from other universities but couldn’t find anything, so we made our own. I’ve translated them, in case someone finds them useful, given that there’s a great shortage of such material in the intertubes. You can get them through the links below, along with their complementary files.

1st assignment [pdf] [files]

  • I think 1.A and 1.B are excellent exercises to make the students fully understand how CSS selectors work and avoid them resulting to only use the 4-5 basic ones just because they don’t understand the rest (like many web developers do). It’s a pity that many of them resulted to online scripts for the conversion (but luckily it was easy to spot: These answers were way more verbose than the corresponding “handmade” ones, and in some cases even incorrect!)
  • I also think 1.C is an excellent exercise for cascading & inheritance practice. Some of the cases were even quite tricky (for instance, the way specificity works for :not() or how grouping works if one of the selectors is invalid) and treated almost all factors that someone should know to predict which rule …overrules. It’s important however that the student justifies the answer, because otherwise they can just test it in a browser and write down the result, without understanding why.
  • I’m not sure yet if freeform questions were a good idea, but (hopefully) they got them to practice their critical thinking and do some research (we hadn’t presented :checked and :lang() in class). We didn’t expect many to get the 3rd one right, but we were pleasantly surprised.
  • What I like in 3.A is that I believe it enforces the Separation of Concerns guideline, since they cannot alter the HTML file (something even professionals commonly do to get something done, the quick & dirty way…) so they have to move all presentation to the CSS file. It also contained a quite tricky part: Maintaining state without JavaScript, by utilizing the :checked pseudo-class and some combinators (a technique made popular quite recently by Ryan Seddon). Obviously, this is not a good way to change views in a photo gallery (too much wasted bandwidth), but it was perfect as a CSS exercise. To my surprise, more than half of the students got it right, which indicates that we probably did a good job explaining CSS Selectors :)

2nd assignment [pdf] [files]

  • I like exercise 1 because it teaches them how they can take somebody else’s work, extend it and make it more generic and useful. This is something that’s frequently done in web development. By the way, the deviation in the solutions was quite interesting. Others had implemented a recursive algorithm, others approached it in an Object Oriented manner and others took the classic iterative route.
  • Exercise 2 lets them practice event delegation, unobtrusive progressive enhancement via JavaScript, decisions to improve performance (and still, it’s unbelievable how many students made choices that were obviously terrible performance-wise. I still remember one script that created another DOM element on every mouseover!)
  • Exercise 3 combines many of the technologies they learned in the previous lectures. It also lets them practice their critical thinking by comparing the methods afterwards. Most students picked the CSS method, which would also be my choice, for such a simple bar chart (however, anything rational got full points, I don’t think there’s a correct answer here, it depends on many factors).
  • I like exercise 4 because it introduces them to the concept of writing JavaScript that is intended to be used by other developers, and not just in a particular project (along with 2 perhaps). However, none of the students fully understood what it was about. All of them fired the HTTP request when ajaxForm() was called and most of them also implemented callback() and errorCallback(), which wasn’t supposed to be their job.
  • Exercise 5, besides serving well as regular JavaScript practice, it also lets them learn more about cutting edge technologies such as localStorage, Web databases or offline web apps.

3rd assignment [pdf] [files]

In this assignment, the students practiced in PHP, combined everything else they’ve learned and understood better how everything clicks together to bring a fully-fledged web application to life. We didn’t get many submissions, since most students were busy with other assignments these days but most of the ones we got were awesome, I had an extremely hard time picking the best one.

Lessons learned

  • Most mistakes are not very original: They tend to appear over and over again in unrelated assignments. Most of them are caused either by ambiguities in the description or because the student didn’t bother to read all of it. Also, the most frequent excuse for not doing something right is “it wasn’t in the description!”. So, they have to be as detailed as possible, including even stuff that’s obvious to someone more experienced.
  • Plagiarism is not a myth, but a real and frequent problem. Students copy from other students, from scripts posted online and from any source they can get their hands on. :( However, only teaching the standards makes it much easier to spot (at least when it comes to copying from the internet) since most scripts posted online have to account for browser incompatibilities.

Labs

We only held 3 hands-on lectures (2 hours each), due to time availability issues of everyone involved in the course. I taught the first 2 and another TA was responsible for the 3rd one. Details below:

1st lab [final result]

The students had to write an HTML file for the single page personal website of some fictional web developer and then use CSS to style it in a certain way. The process was guided, in order to keep all of them on the same track. The site was carefully designed to demonstrate many key CSS concepts & features at once.

2nd lab [final result] [JS code] [incomplete JS code]

The students were given an HTML and a CSS file and they had to fill in a .js file that had some parts missing (replaced by TODO comments as placeholders) to complete a very simple ajax rating widget.

Lessons learned

  • Never provide downloadable slides with the things the students must write by themselves prior to the lecture. They’ll just copy-paste everything from the pdf, even if they have to fix spacing afterwards. If you absolutely have to, make sure the text is not selectable.
  • It takes students far more time to write code than you planned for
  • When the students don’t understand something, most of them won’t ask. :( It’s best if you personally explain things to anyone having difficulties, but there’s usually not enough time for that

Personal aftermath

  • I found out that I love teaching. Successfully helping a student with a problem they had or something they did not understand was sometimes enough to make my day. Preparing material for the course --although exhausting-- was one of the most interesting and creative things I have ever done. Even the actual teaching is thrilling. It’s very challenging to try to keep the students’ interest, since most of them will resort to chatting with their buddies instead of paying attention way more easily than professionals would during a conference talk. However, if you manage to do so, it can be quite rewarding.
  • I hate grading. It’s boring, time-consuming, carries a lot of responsibility and you have to ensure every point you deduct is justified, because you might have to defend your judgement in case a student complains. Sometimes it can also freak you out completely (“OMGWTF, how could they understand it so wrong?? Why didn’t they ask?”) These strips sum it up perfectly (and with a good dose of humor):

Grading Rubric

If only

Articles, Original, Personal, CSS, Education, JS, HTML, Web Standards, SVG, Teaching, XPath, XSLT
Edit post on GitHub

"Wow, Mona Lisa with pure CSS!"

2 min read 0 comments Report broken page

There has been a recent flood of CSS experiments that utilize CSS3 features to convert some meaningless markup to spectacular pictures. It all started when David Desandro used CSS3 to draw the Opera logo. This seemed to inspire lots of other folks who created similar demos:

I can certainly share their enthusiasm and I am also amazed by their results. Besides that, I think that pushing CSS3 to the edge like that, helps us understand the spec better, which leads us to find and file browser bugs or write comments regarding the spec itself. Filing bugs is crucial at this stage, with all browser vendors gradually adding experimental --and frequently buggy-- CSS3 support to their products. Also, don’t get me wrong: I can easily see the benefits of reducing the number of images in a web application interface (far quicker/easier modifications, less HTTP requests and most of the time, less bandwidth).

However, I’m afraid we’re losing sight of the big picture. These aren’t demos that are or will ever be legitimate CSS use cases. Even after universal CSS3 browser support is achieved, they would (and should) still be considered “hacks”. Almost all the arguments pro their usage also apply to more suitable ways of including images in web applications:

  • Fewer HTTP requests: Same with any kind of embedded image (data URIs, inline SVG and so on)
  • Scalable: Same with SVG and symbols embedded in custom fonts
  • Easier to modify: Same with SVG
  • Less bandwidth (in some cases): Same with SVG (and it can be cached too, when not inline)

And apart from these, these illustrations require non-semantic crap to be included in the markup which, besides issues of theoretical purity, makes it harder for other people to use them.

As for the graceful degradation argument, yes, this does only apply to CSS “images”. But in this case, is it really an advantage? I seriously doubt it. People won’t notice rounded corners if they’re missing from an interface, but they’re definitely going to notice a blocky Opera logo. And they’re not used in thinking that their browser has something to do with how an image renders, so they’ll just blame the website.

CSS is supposed to enhance the presentation of a document or interface, not to be (ab)used for the creation of illustrations from scratch. It’s supposed to separate presentation from structure, not generate stuff. There are other technologies that are far more suitable for this (*cough*SVG*cough*). I think we should use our energy and creativity to make CSS3 demos that people will actually use in the future when all this is fully supported, not stuff doomed to be eternally considered hackery.

“Where should we draw the line?” one might ask. For example, is a Pure CSS analog clock a CSS abuse case? Or even my own CSS iPhone keyboard? Now that’s a good question! A rule of thumb seems to be “if it inherently (=not due to browser support issues) involves a bunch of empty (or with meaningless content) HTML elements, then that’s a bad sign” but that might be overly strict. What’s your take on it?

Disclaimer: Yes, I’m fully aware that most of the time, such experiments are created just for fun by their (very talented) authors, which are perfectly aware of all the things mentioned above. However, I’ve also grown tired of reading comments by people that seem to to think that “This is the future of the web!”. Let’s hope it’s not.